इस Tutorial में हम आपको Blogger Blog में Custom URL Redirect Add करने की पूरी जानकारी देंगे. आप जानेंगे कि URL Redirect क्या होता है? और Blogger Blog में Custom URL Redirect Add कैसे करते हैं?
What is Custom URL Redirect in Hindi?
URL Redirect एक ऐसा Function होता हैं जिसकी सहायता से एक URL को दूसरे URL पर Point किया जाता है. मतलब Visitors द्वारा abc.com/search-this/ सर्च किया जा रहा है तो इस URL को सर्च करने पर Server द्वारा Visitors को abc.com/search-that/ पर भेज दिया जाता है. और इस कार्य के बारे में Visitors प्रभावित नही होता है.
URL Redirection का कार्य सर्वर पर होता है और सर्वर द्वारा ही Execute किया जाता है. इसलिए सामान्य पाठकों को इस बारे में पता नही चलता है. लेकिन, खुद Blog Owners अपने पाठकों को इस बारे में सूचित कर सकते है. जो पाठकों से संबंध मजबूत करने की ओर सफल कदम होता है.
URL Redirect के द्वारा Blog Owners डिलिट किये गये वेबपेज,Updated URLs आदि को New URL पर Point कर सकते हैं. और यहीं कार्य Blogger Blog पर Publish Posts/Pages के लिए किया जाता हैं.
यदि आपने किसी Blogger Post का Permalink Address Change किया हैं. कोई Page या Post Delete की हैं. दो या अधिक पोस्टों को Merge किया हैं. तब आप Blogger Blog में Custom URL Add कर सकते हैं.
Custom URL Redirect के फायदें
Custom URL Redirect का सबसे बडा फायदा होता है कि ब्लॉग पाठकों को हमेशा जानकारी उपलब्ध रहती है. उन्हे खाली नही लौटना पडता है. जो Blog Owners और Visitors दोनों के लिए महत्वपूर्ण होता हैं. इसके अलावा:
- Search Engines के लिहाज से URL Redirect करना एक समझदारी भरा कार्य हैं. क्योंकि सर्च इंजनों को भी 404 – Page Not Found पसंद नही हैं. इसलिए Blog Ranking के लिए उपयुक्त URL Redirect का इस्तेमाल करना बेहतर होता है.
- Merged Posts/Pages को New URL पर Redirect करने के लिए
- Deleted Posts/Pages को Updated Post/Page पर Redirect करने के लिए
- यदि आपने किसी Publish Posts/Pages का P Address Change किया है तो उसे New URL पर Point करने के लिए करने के लिए किया जाता हैं.
Blogger Blog में Custom URL Redirect Set करने का तरीका
Step: #1
Blogger.com पर जाकर गूगल अकाउंट से Log in कीजिए. Log in करने के लिए आप अपनी Gmail ID और Password का इस्तेमाल करें. और उसी अकाउंट का इस्तेमाल करे जिससे आपने ब्लॉगर पर Sing in किया था.
Step: #2
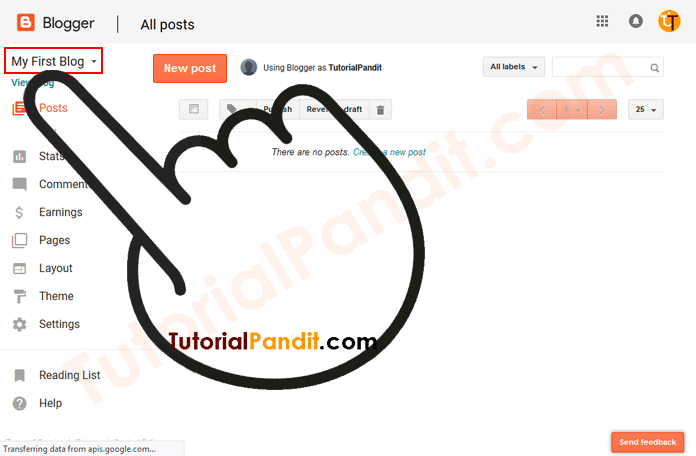
Blogger पर लॉग इन करने के बाद आपके सामने Blogger Dashboard खुल जायेगा. यहाँ से आप Blog List से Down Arrow ⌄ की सहायता से अपना ब्लॉग सेलेक्ट कर लें. मतलब आप जिस Blogger Blog को अपडेट करना चाहते है. अगर आपके पास एक से ज्यादा ब्लॉग है तो. अगर आपके पास केवल एक ही ब्लॉग़ है तब आप ये स्टेप छोड दें.
Step: #3
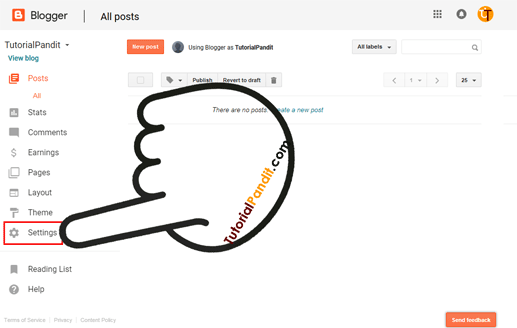
अब आपके सामने Blog Specific Dashboard Open होगा. यहाँ से आप बांए तरफ मौजूद Settings पर क्लिक कीजिए.
Step: #4
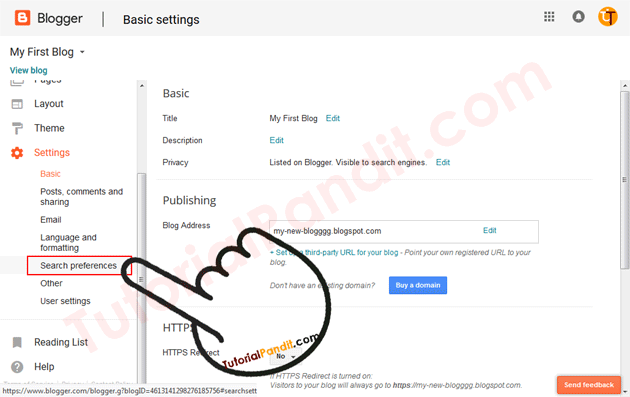
ऐसा करने पर आपके सामने Blogger Settings Expand हो जायेगि. यहाँ से आप Search Preferences सेटिंग पर क्लिक कीजिए.
Step: #5
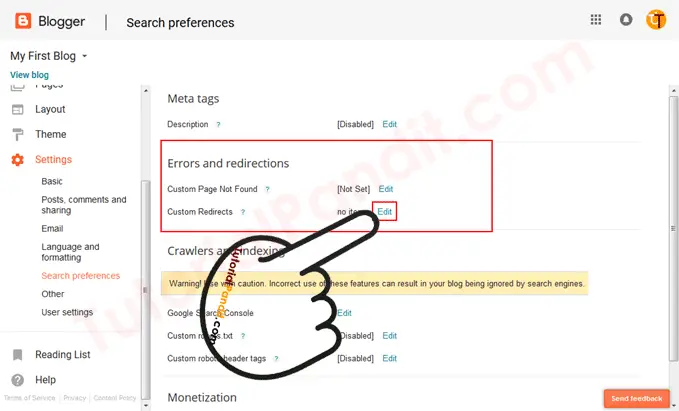
अब आपके सामने Blogger Search Preferences सेटिंग Open होगी. यहाँ से आप Errors and redirections के भीतर मौजूद Custom redirects के सामने Edit पर क्लिक कीजिए.
Step: #6
ऐसा करने पर आपके सामने Errors and redirections Box Open होगा. जिसमे आपको निम्न सेटिंग करनी हैं.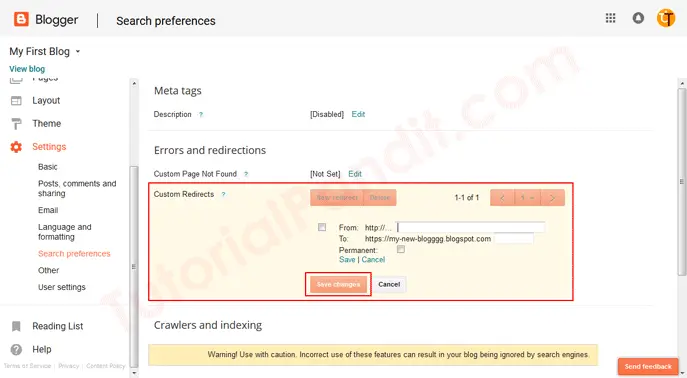
- From: इस बॉक्स में आपको उस URL को लिखना है जिसे आप Redirect करना चाहते है.
- To: इस बॉक्स में आपको उस URL को लिखना है जिस पर आप पूराने URL को भेजना चाहते है. जैसे आपका पूराना URL abc.com/this-url है और आप इसे abc.com/that-url पर भेजना चाहते है तो यहाँ पर abc.com/that-url को लिखिए. और पहले वाले में abc.com/this-url लिखा जायेगा.
- Permanent: यदि आप इस Change को हमेशा के लिए कर रहे है तो इस बॉक्स को Check कीजिए. अन्यथा रहने दीजिए.
Step: #7
बधाई हों! आपने Successfully Custom URL Set कर लिया है. आप इसी तरह अन्य URLs को भी Set कर सकते है.
आपने क्या सीखा?
इस Tutorial में हमने आपको Blogger Blog में Custom URL Redirect Add करने के बारे में पूरी जानकारी दी हैं. आपने जाना कि Custom URL Redirect क्या होता है? और Custom URL Redirect Set कैसे किया जाता हैं? हमे उम्मीद है कि यह Tutorial आपके लिए उपयोगी साबित होगा.
#BeDigital







Home Page Par Redirect Kaise Kare Please Bata Do
मोहित जी, जिस पेज को होमपेज पर Redirect करना चाहते है उस पेज के हैडर में Redirect Code लगा दीजिए. जो नीचे दिया जा रहा है.
content में सैकण्ड लिखनी है और वेबसाइट के स्थान पर वह यूआरएल लिखना है जिस पर आप रिडायरेक्ट करना चाहते हैं.
Thanks for free tutorial
this article very useful for beginner’s